Maintaining your home’s exterior is essential for curb appeal and longevity, and one often-overlooked task is roof cleaning. Over time, roofs accumulate dirt, moss, algae, and other debris that can damage shingles and reduce the roof’s lifespan. Power washing is an effective way to clean your roof and keep it in good condition. In this guide, we’ll walk you through the steps of how to power wash a roof safely and effectively.
Why Power Wash Your Roof?
Before we dive into the process, let’s understand why power washing your roof is important:
- Prevents Damage: Moss and algae can cause shingles to lift and deteriorate, leading to leaks and other damage.
- Improves Aesthetics: A clean roof enhances your home’s appearance, making it look well-maintained and attractive.
- Increases Longevity: Regular cleaning helps maintain the integrity of the shingles, extending the life of your roof.
- Boosts Energy Efficiency: A clean roof reflects sunlight more effectively, helping to keep your home cooler and reducing energy costs.
Tools and Materials You’ll Need
To power wash your roof, gather the following tools and materials:
- Pressure washer with a low-pressure nozzle
- Ladder
- Safety harness and ropes
- Garden hose
- Roof cleaner solution
- Soft-bristle brush or broom
- Protective clothing and goggles
How to Power Wash a Roof
Power washing a roof requires careful attention to detail and adherence to safety protocols. Follow these steps to ensure a thorough and safe cleaning process:
Step 1: Prepare the Area
Before you begin power washing your roof, it’s crucial to prepare the area to protect nearby plants, furniture, and surfaces from damage. Start by covering any plants, outdoor furniture, and surfaces near your work area with plastic sheeting or tarps. This protective layer will shield them from the cleaning solution and debris that will inevitably be washed off the roof.
Once the area is protected, clear any loose debris such as leaves, branches, and dirt from the roof using a broom or leaf blower. Removing this debris beforehand helps prevent clogs in your gutters and ensures a more effective and efficient cleaning process.
Step 2: Apply Roof Cleaner
Applying a roof cleaner solution is an essential step in the power washing process as it helps break down algae, moss, and dirt that have accumulated on your roof. Begin by mixing the roof cleaner solution according to the manufacturer’s instructions, using a garden sprayer to combine and apply the mixture. Starting at the bottom of the roof, spray the cleaner onto the surface in manageable sections.
This method ensures that the solution doesn’t dry too quickly and allows it to penetrate and loosen the grime effectively. Let the solution sit for the recommended duration, usually between 15 and 20 minutes, to fully break down the contaminants.
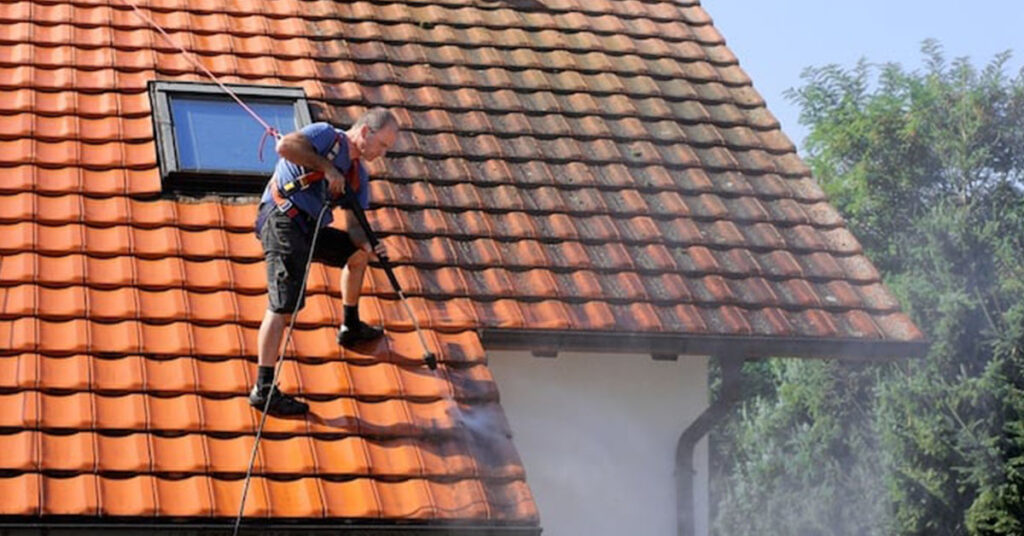
Step 3: Power Wash the Roof
With the roof cleaner solution applied and given time to work, it’s time to power wash the roof. Adjust your pressure washer to a low setting, typically between 1200 and 1500 psi, to avoid causing damage to the shingles. Begin washing at the top of the roof and work your way down, which prevents water from seeping under the shingles.
Hold the nozzle at a consistent distance of 6 to 12 inches from the roof surface and use sweeping motions to remove the cleaner and debris. Be thorough but gentle, ensuring you do not use excessive force that could damage the roofing material. Rinse the roof thoroughly to ensure all the cleaning solution and loosened debris are washed away.
Step 4: Inspect and Clean Up
After power washing the roof, it’s important to inspect the entire surface to ensure no areas were missed and to check for any potential damage. Look for spots that might need additional cleaning and repeat the process on those areas if necessary. Once you’re satisfied with the cleanliness of your roof, proceed to clean up the surrounding area.
Remove the tarps and plastic sheeting used to protect plants and furniture, and rinse off any surfaces that came into contact with the cleaning solution to prevent any residual damage. This final step ensures that your property is left clean and free from any cleaning residue.
Safety Tips
When power washing a roof, safety should always be a top priority. Use a 25-degree nozzle, which is ideal for roof cleaning as it provides adequate pressure without damaging the shingles. Avoid using high pressure or harsh chemicals that can deteriorate the roofing material.
Wear appropriate safety gear including non-slip shoes, a safety harness, and goggles to protect yourself from falls and debris. Ensure your ladder is stable and securely placed before climbing to the roof. These precautions will help you carry out the task safely and effectively, minimizing the risk of injury or damage.
Read More: Do You Tip A Roofer?
Conclusion
Power washing your roof is a crucial maintenance task that can significantly enhance the appearance and longevity of your home. By following these steps and safety precautions, you can effectively clean your roof, prevent damage, and keep it looking its best. Regular cleaning not only improves your home’s aesthetics but also ensures your roof remains in top condition for years to come.